This tutorial is written in a way so "everyone" can understand it. Since I'm a beginner myself I decided to make it detailed. Some advanced sewers may find it too detailed or the instructions too obvious. You have been warned
Before starting you should measure the circumference of your head, then add about 5cm for a tight and firm strap.
If you prefer a bit more loose, add 10cm instead.
You can play around with your measurement band before deciding what size you prefer.
You may also take into account the length of cable of your headphones.
The cable should be able to loop twice around the strap, plus leaving a little extra for the plug (5-10cm).
In my case the cable is 150cm so the circumference of the strap should be max (150cm - 10cm) /2 = 70cm.
Since my head is 60cm, anywhere between 65cm and 70cm would do. I'll be using 70cm in this tutorial.
Next is to figure out how wide the strap should be.
Measure the circumference of your headphones or plug (whichever is bigger), add 0,5cm and divide it by 2.
My plug has an L-shape which makes it bigger than the earplugs. The plug measure about 4,5cm in circumference.
The width of my straps should be minimum (4,5cm + 0,5cm) / 2 = 2,5cm
I choose to make it 3cm to make it easier to get the cable through.
3-4cm should be enough for most headphones, but you may make it even wider if you wish.
Now that we're done with the boring math we can continue with the fun math
1.
D (inside): circumference + 1cm + (2 x seam allowance)
B (backside): 30cm + (2 x seam allowance)
C (front, top): (circumference - 30cm) / 2 + (2 x seam allowance)
A (front, bottom): C + 1cm
Width on all pieces: width + (2 x seam allowance)
I choose 1cm seam allowance and will be using that in this tutorial.
In my case that gave the following measurements:
D: 73cm X 5cm
B: 32cm X 5cm
C: 22cm X 5cm
A: 23cm X 5cm
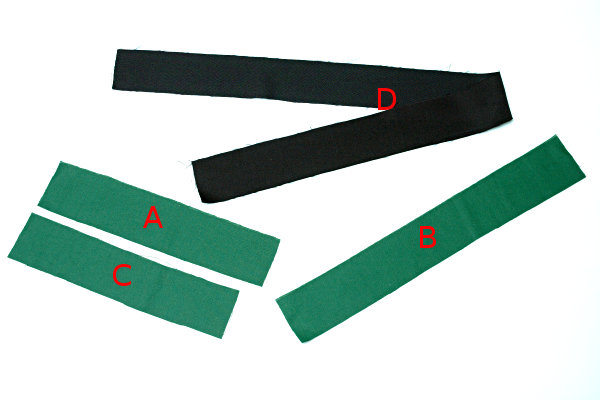
I picked different colour on the inner and outer fabric to make it easier to follow.
2.
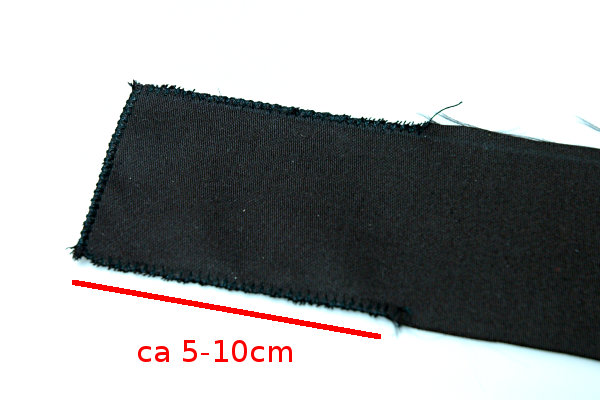
Zig-zag about 5-10cm along the edge on both ends of D and on either end of A.
3.
If you wish you may mark the seam line on the wrong side of the fabric. Otherwise you can use the seam allowance marks on your sewing machine.
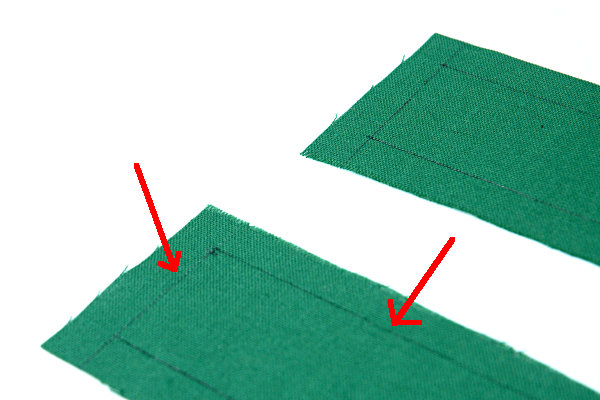
4.
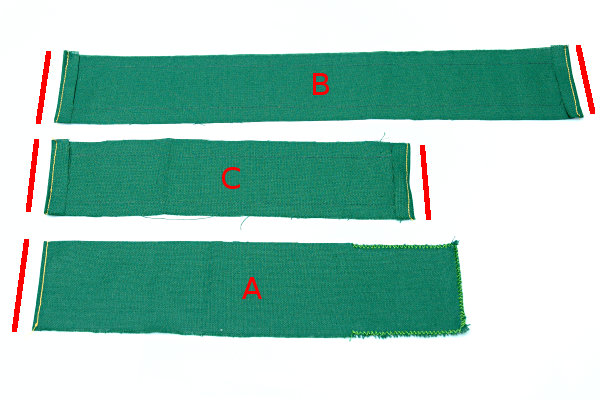
Fold 1cm on both ends of B and C, plus one end of A (the one you didn't zig-zag). Top-stitch on each fold. See red lines in picture.
5.
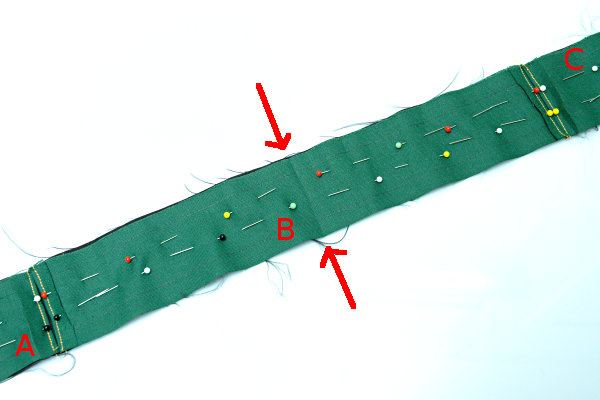
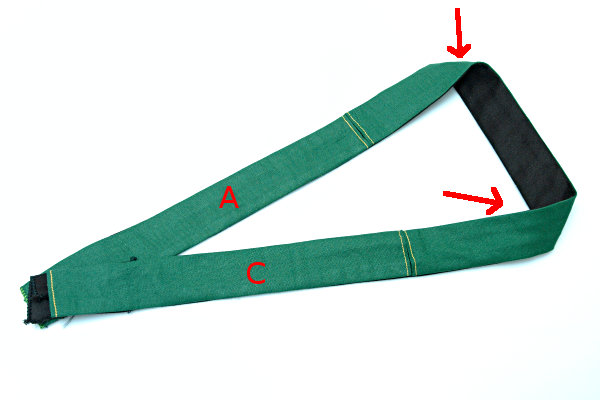
Fold D in half. Do the same with B and align them on the middle, right sides facing. Pin.
Pin A and C on each side of B. Note that you want the end of A with the fold against B.
6.
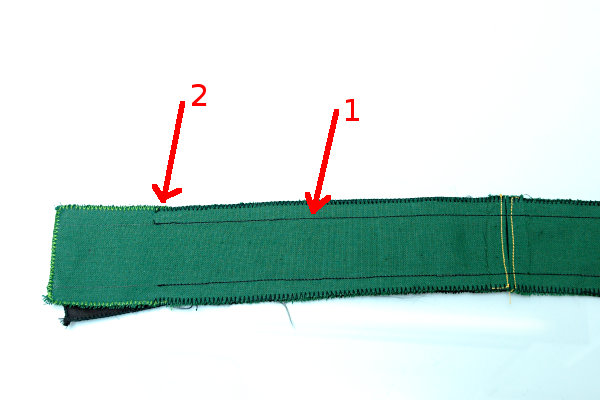
Stitch along both sides (1). Stop about 5cm from each end. Zig-zag the edges (2). Also stop 5cm from the ends.
7.
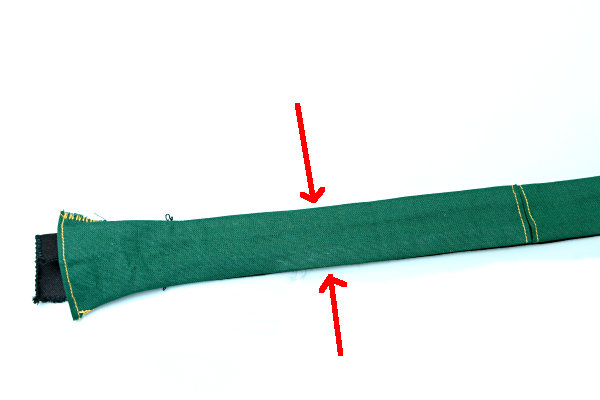
Turn inside-out and press with the iron. Make sure you press the seams all the way out.
8.
Put C on top of A like in the picture. Also pay attention to how the strap wraps around the neck (red arrows).
9.
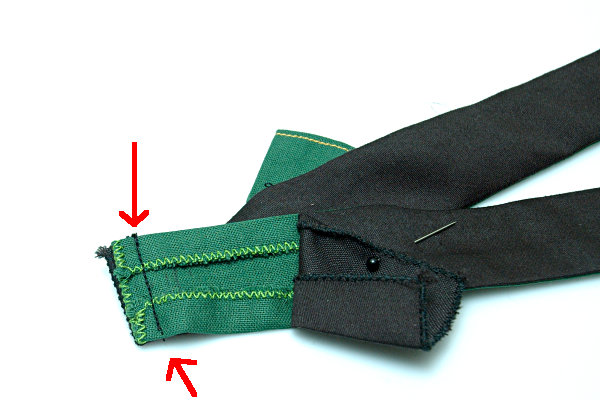
Stitch A and D as shown in picture.
10.
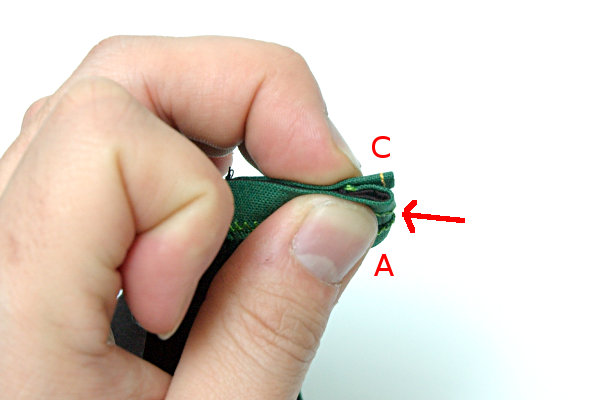
Fold A so it gets under C. Top-stitch along the edge (make sure this top-stitch goes through A and D only).
11.
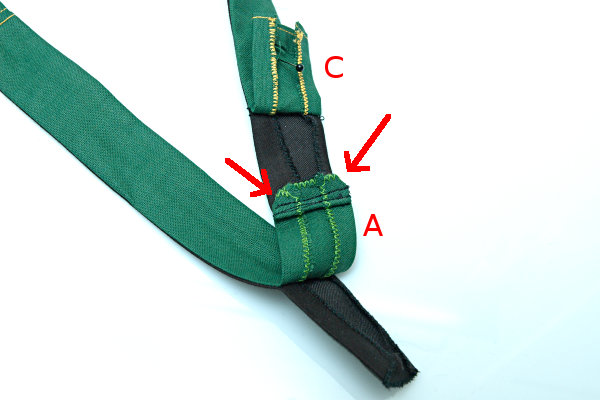
Trim or fold the corners. Use an iron or glue to make it stay. Put C over.
12.

Top-stitch along both edges all the way around the strap.
Be careful not to top-stitch the overlapping ends together.
13.
Cut about 10cm of velcro (the loop side).
Trim or fold the corners of D like in point 11.
Stitch one end of the velcro to D.
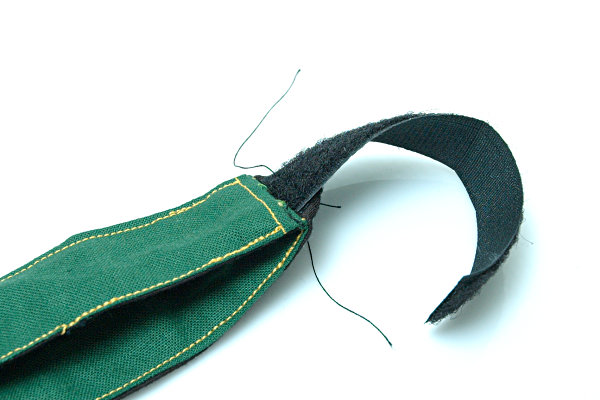
14.
Fold the velcro and stitch the other end.
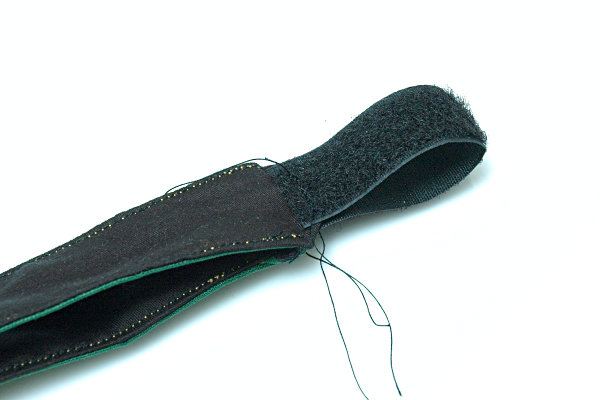
15.

Stitch tiny zig-zag at the end of the velcro (1).
Stitch the edges of the velcro together (2).
16.
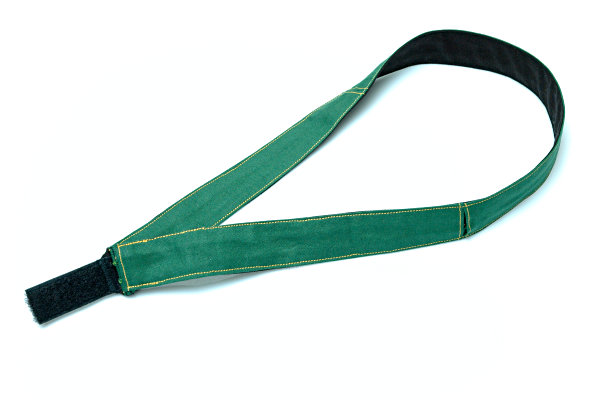
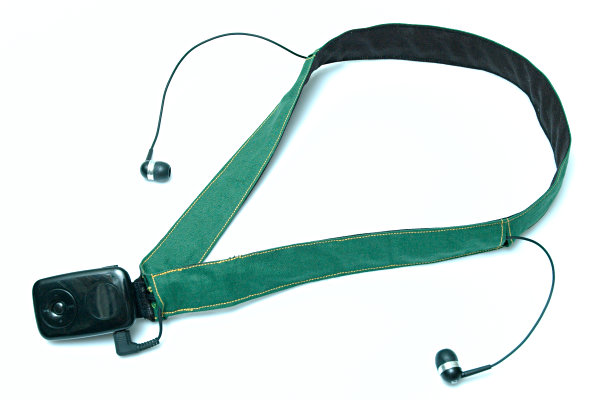
Done!
Threading the cable
1.
Start with the long end with the ear plug. Normally this is the one that goes to the right ear. You may want to remove the rubber or muffler for this part.
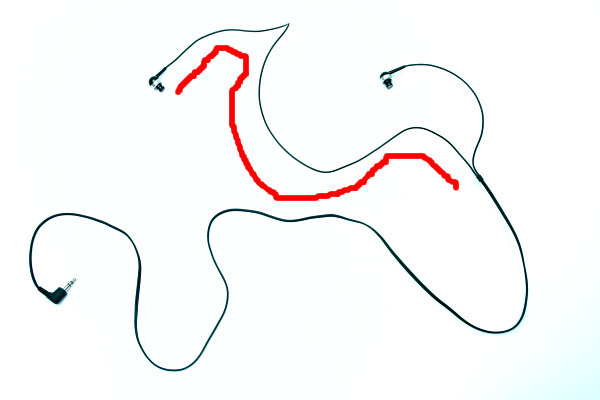
2.
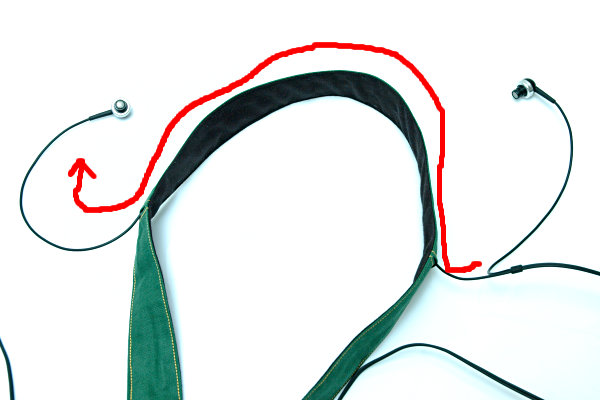
Pull it through the back side of the strap (piece B).
3.
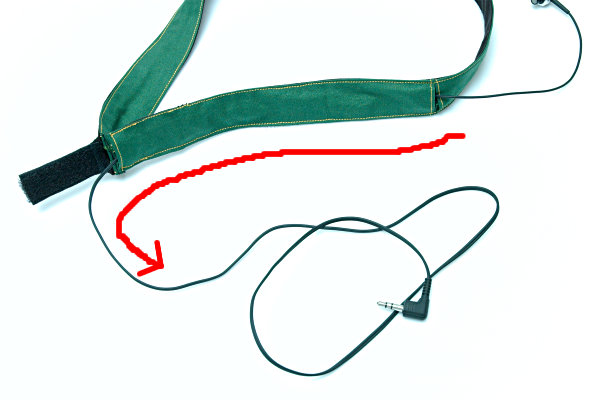
Pull the plug end through C.
4.

Continue pulling the plug through A.
5.
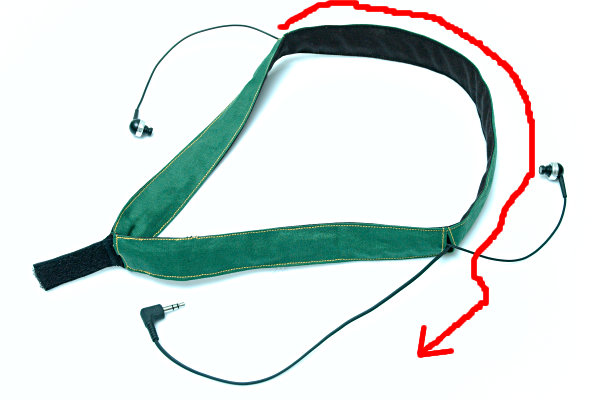
The plug continues through B.
6.
And finally goes through C a second time.
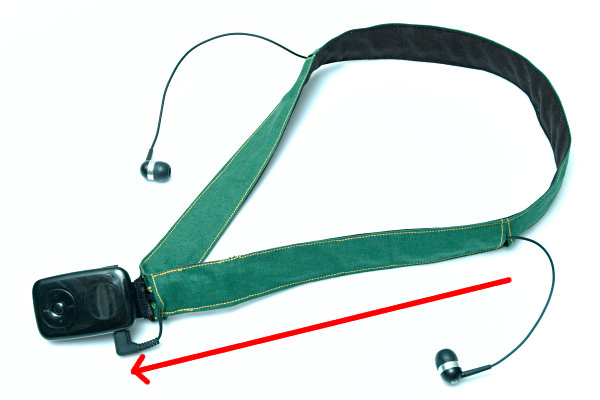
7.
Attach a self-adhesive velcro (hook side) to your MP3 player.
 TikTok
 YouTube